![]()
![]()
Epitomax
Patient Portal
Version
2.0
2/3/2011
PsyTech Solutions, Inc.
Tony Kline

Table of Contents
Epitomax Patient Portal Release 2
Enhanced Account Balance
Screen
New client signature
features on forms
Configuring a client
signature on a form
Clients can sign forms
from the Patient Portal
Clients can sign forms in
Epitomax
Limiting which staff can
invite a client to use the Patient Portal
Epitomax Patient Portal Release 2
Enhanced Account Balance Screen
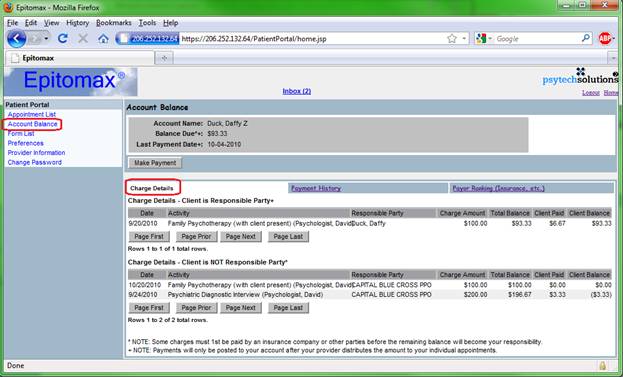
The ‘Charge Details’ view is unchanged from the Patient Portal release 1. It allows the client to see balances due for service activities, and what balance is due by each responsible party. If you’ve signed up for a PayJunction Merchant Services Account, clients can also make credit card payments to you using the ‘Make Payment’ button on this screen.
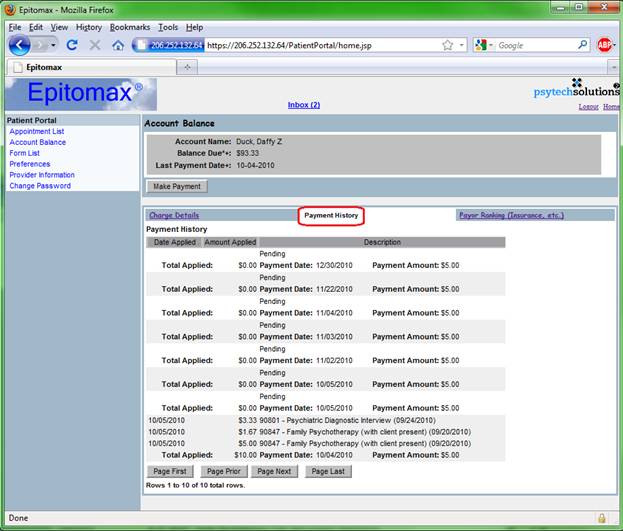
Payment History
The new ‘Payment History’ lists payments made at the office and payments made from the Patient Portal (requires PayJunction Merchant Services Account). This screen also offers details on payments, allowing a client to see how that payment has been applied to service activities.
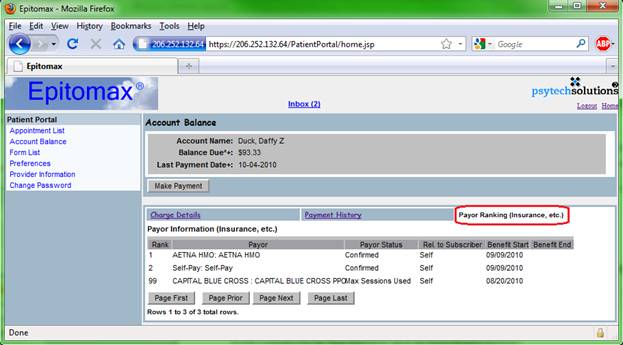
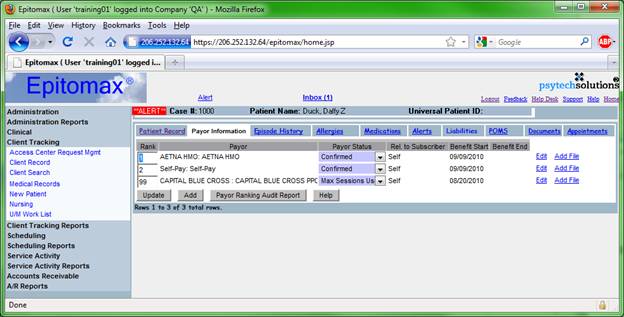
Payor Ranking
The new ‘Payor Ranking (Insurance, etc.)’ lists the Payor Rankings on file for this client. (This is the same list that is viewable from the ‘Payor Information’ tab on the Client Record in Epitomax.)
Payor Ranking as seen in Epitomax:
New client signature features on forms
The signatures on Forms in Epitomax has been enhanced so that clients can sign a form using their Patient Portal username and password, similarly to the way that staff members sign forms with their Epitomax username and password.
Configuring a client signature on a form
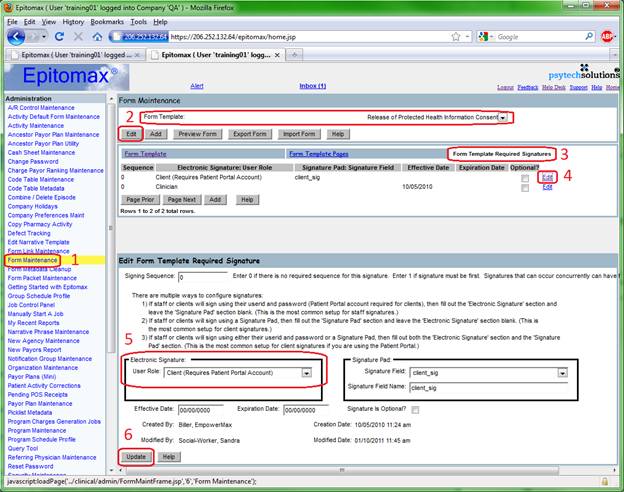
1. Go to the ‘Administration/Form Maintenance’ screen.
2. Select the form that you want clients to be able to sign using their Patient Portal account. Click the ‘Edit’ button.
3. Click on the ‘Form Template Required Signatures’ tab.
4. If there is no client signature yet defined for this form, click the ‘Add’ button. If you use a signature pad to have clients sign a form, and you already have a client signature defined for the signature pad, click the ‘Edit’ link that corresponds to that signature. (By defining 1 signature with both a signature pad field and the Client user role, the client can sign using either method.)
5. Choose the ‘Client (Requires Patient Portal Account)’ from the Electronic Signature ‘User Role’ drop down.
6. Click the ‘Update’ button.
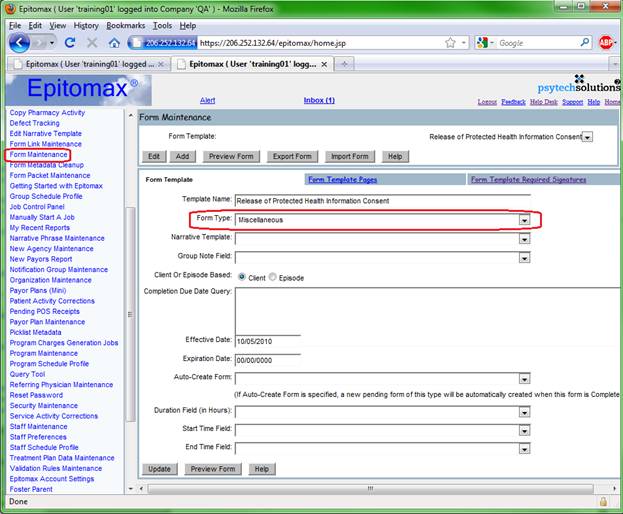
Only Miscellaneous forms will appear in the Patient Portal.
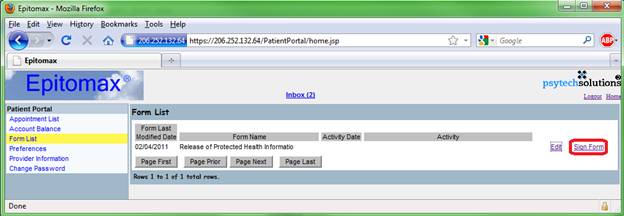
Clients can sign forms from the Patient Portal
First, add the form to the client’s
chart.

If the form type is Miscellaneous, and if
there is a ‘Client (Requires Patient Portal Account)’ signature defined for the
form, then it will appear in the Form List in the Patient Portal.
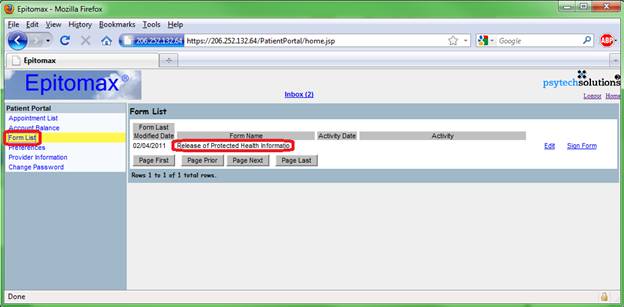
Clicking the ‘Edit’ link for a form will open it in Edit Mode just like in Epitomax. The client can make changes to the form and save them.
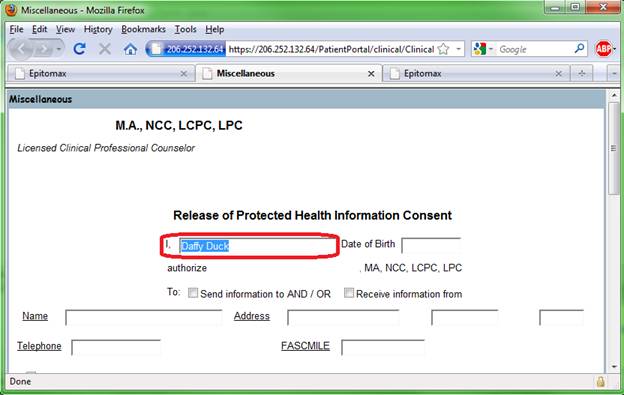
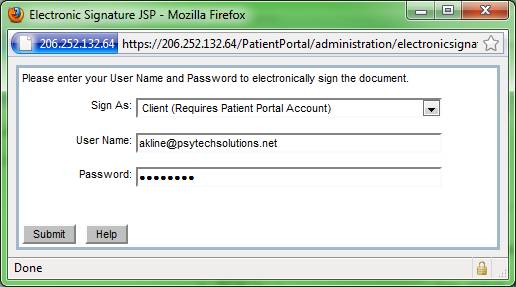
The client can sign the form either by clicking the ‘Sign’ button while the form is open, or by clicking the ‘Sign Form’ link from the Form List.
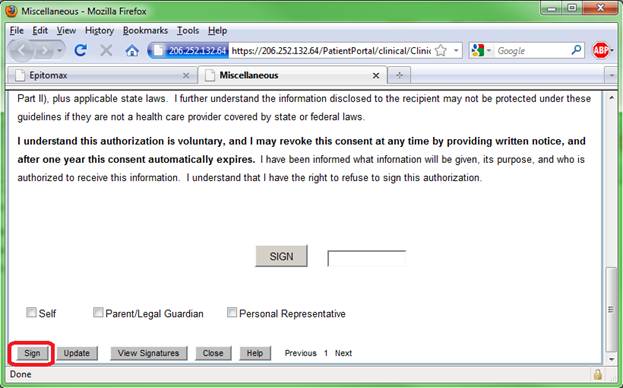
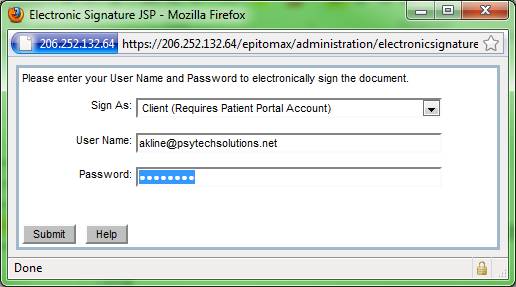
The client enters their Patient Portal username and password to sign the form.
Clients can sign forms in Epitomax
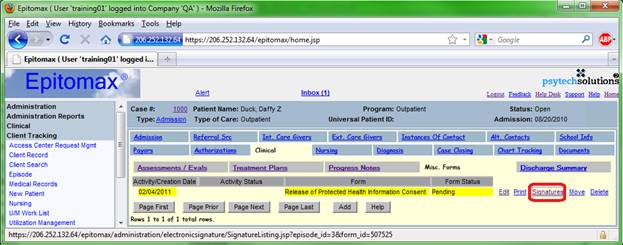
You can also have your clients sign forms using their Patient Portal username and password from within Epitomax. This makes it convenient for clients to sign forms while at your office without using a signature pad. Any location where a clinician can sign a form, there is also a new ‘Add Client Signature’ button.
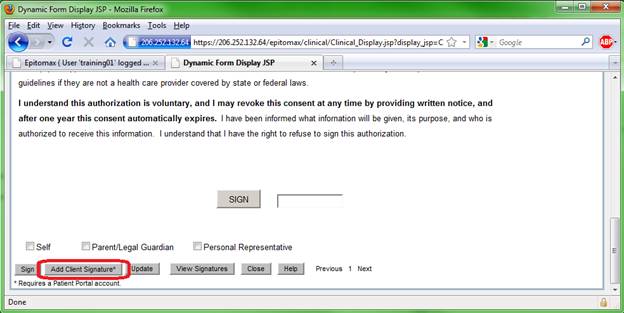

Clicking on an ‘Add Client Signature’ button brings up the signature window in the Client Role mode for the client to sign.
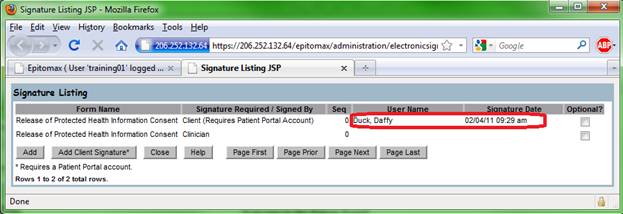
Viewing Client Signatures
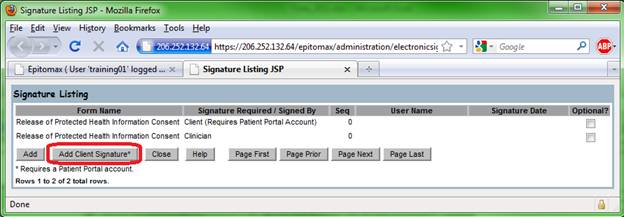
Once a client has signed the form, we can see their signature in the Signature Listing in Epitomax.
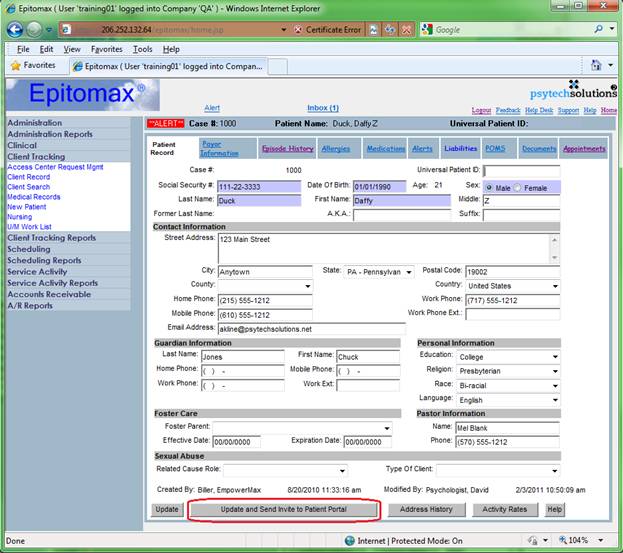
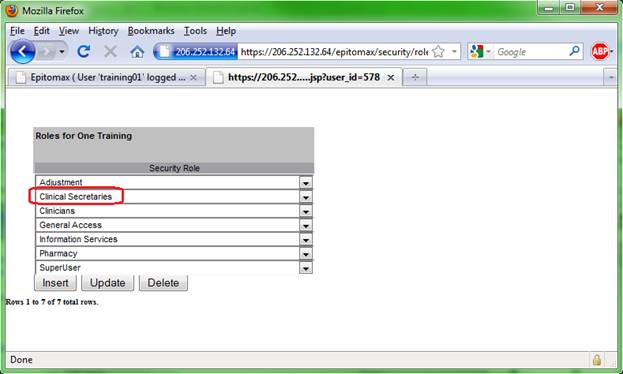
Limiting which staff can invite a client to use the Patient Portal
You can restrict which staff members are able to invite clients to use the Patient Portal by using the security roles.
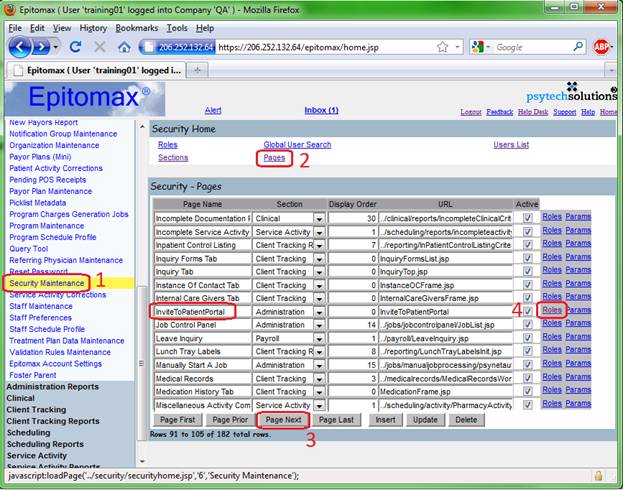
1. Go to the Administration/Security Maintenance screen.
2. Click the ‘Pages’ link at the top of the screen.
3. Click the ‘Page Next’ button until the ‘InviteToPatientPortal’ page appears on the screen.
4. Click the ‘Roles’ like that corresponds to the ‘InviteToPatientPortal’ entry.
You can add or remove roles that have access to the ‘Update and Invite Patient to Patient Portal’ button here.
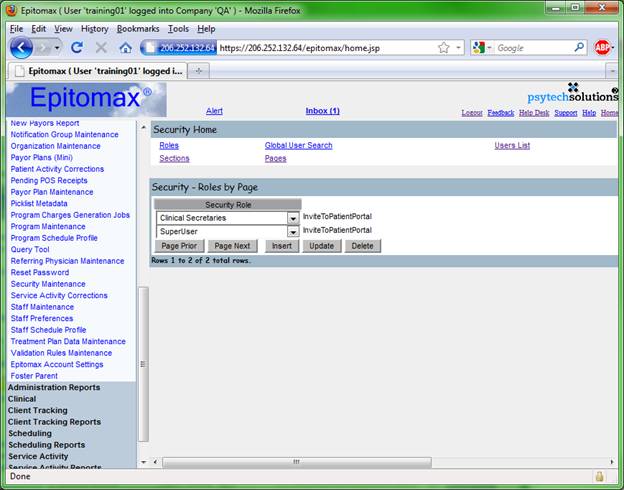
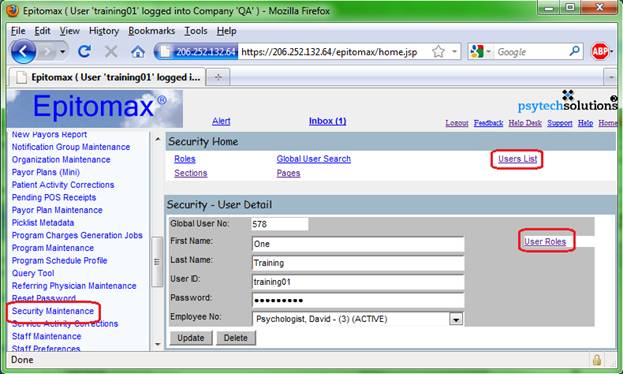
Any staff member with one or more of these roles can invite a client to the Patient Portal. Staff member roles are managed from the Administration/Security Maintenance screen, click the ‘Users List’ link and find the staff member you wish to modify roles for.
The screen shot below is taken from a Client Record viewed by a staff member who cannot click the ‘Update and Send Invite to Patient Portal’ button because it is disabled.
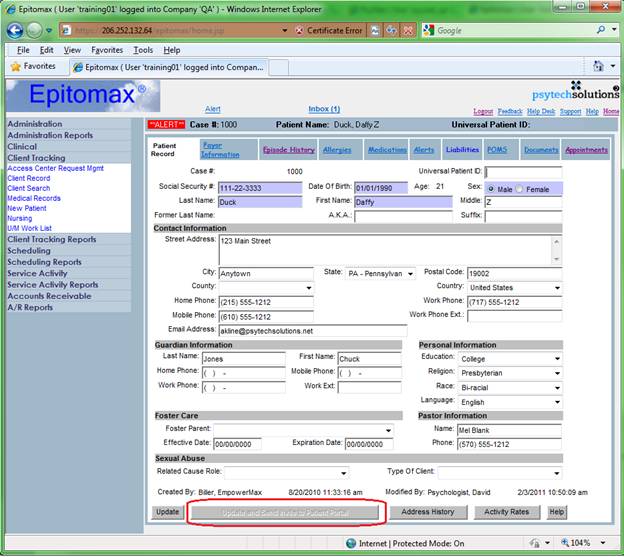
In this screen shot, the staff member is able to click the ‘Update and Send Invite to Patient Portal’ button.